Maintaining & Cleaning Showers
The shower is a daily refuge, but everything from mildew to a blocked shower head can quickly ruin the experience. In this guide, we'll take you through some attainable ways to keep your showering space sparkling clean and help to maintain its condition for years to come.

Intro
Although showers are used to get yourself clean, maintaining the cleanliness of the shower itself can prove more difficult. Battling against grime, mildew and hard water stains can seem daunting, but with just a little after-shower upkeep and a once-a-week deeper clean, you can prevent stains and residue from taking over. In this guide, you will be taken through how to clean showers of various materials (tile, stone and fibreglass) and their accompanying doors, drains and shower heads, using quick methods that use simple and natural ingredients you can find around the house.
How To Clean Shower Glass
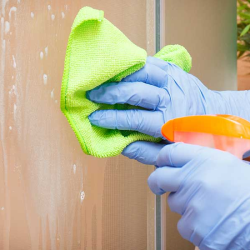
In this section, we’ll take you through the best methods to clean your glass, fibreglass, tile, or stone shower. For all types of materials, a brush is a must-have tool and will do a better job than a sponge at loosening all that built-up soap scum. You will also want to have a squeegee (or, failing that, an absorbent bath towel) on hand to clear away all the excess water after you take your showers to further prevent water deposits from building up.
As a general rule, bathroom cleaners found at supermarkets offer a convenient way to prevent build-up on most materials, providing you follow the manufacturer's instructions and consider that using too much of it can cause irritating streaking.
However, it can be effective to use a more specific DIY method to bring the best out of your shower. Glass: To ensure your shower glass door is gleaming, simply microwave some distilled white vinegar and mix in an equal amount of dish soap. Pour your concoction into a spray bottle and coat both sides of your shower glass. After leaving it for around 30 minutes, dry it off with a microfibre cloth and voilà! You’re all done. However, if you have a stone surface you’re concerned could become damaged, swap out the vinegar for baking soda and gently scrub using a sponge (or toothbrush for the more delicate areas such as along the door track) before completing with a final, thorough rinse.
Fibreglass: Showers made out of fibreglass or that have acrylic shower panels are extremely popular and thankfully easy to keep clean with a few household ingredients. It’s as easy as levelling up your store-bought shower screen cleaner with equal parts vinegar and dish soap, letting it sit for 10 minutes, then wiping away using a non-abrasive brush to avoid scratching the surface.
Tile: Shower tiles are relatively low-maintenance and their durable nature makes them a popular choice, however, the grout between the tiles can attract unwanted mildew and grime. For this, it’s best to purchase a commercial tile cleaner (or you can mix equal parts vinegar and dish soap) to spray on the tiles, scrub with a soft-bristled brush and then rinse, ensuring to remove excess water with a towel or squeegee.
Stone: Showers made out of natural stone such as marble, granite or travertine, require specialised treatment as their permeability leaves them more vulnerable to stains and scratches. Unlike the other materials mentioned, acidic ingredients such as vinegar should be avoided and replaced with dish soap and water. Next, simply buff the surface using a microfibre cloth, rinse, then dry immediately with a soft towel. To keep your stone shower free from stains, it’s best to dry your shower after every use, polish the surface weekly and consider using a stone sealer twice a year.
How To Clean Shower Head
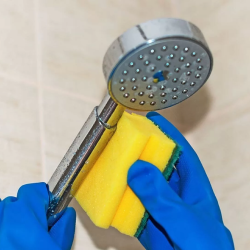
Unfortunately, due to the properties of water, shower heads becoming dirty is an unavoidable fact of life. You should aim to clean your shower head at least once every other month to ensure limescale build-up cannot slow down water flow, reduce water pressure, or allow dangerous bacteria to grow. Thankfully, the task is not too arduous and you may very well find that your house already has all the tools needed to take on the job.
This is a quick and effective method that is able to bypass the inconvenience of removing the shower head. It is also an affordable, non-toxic choice that will not stain any surfaces - win-win!
Step By Step Guide to Cleaning Shower Head
What you will need:
- A large plastic sandwich bag
- Distilled white vinegar / cleaning vinegar
- An elastic band / duct-tape / string
- A clean toothbrush
- Baking soda (optional)
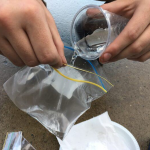
Step 1
First things first: fill up your sandwich bag with white vinegar for cleaning. If the limescale build-up is looking really stubborn, go ahead and add a few tbsps of baking soda to the vinegar, too.
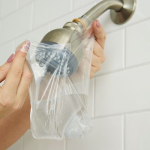
Step 2
Next, place the filled bag over the shower head, ensuring that it is completely submerged in the vinegar.
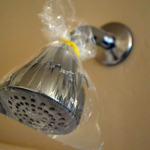
Step 3
Secure the bag using an elastic band, duct tape, or string around the shower arm.

Step 4
Wait a few hours - preferably overnight - before removing the bag. Please note that if you have a brass or nickel shower head, you should only wait 30 minutes as any longer could damage the finish.
Step 5
If necessary, finish by using a toothbrush dipped in baking soda and vinegar to scrub any persistent residue away.
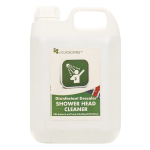
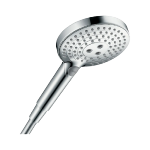
As an alternative, you can purchase pre-made shower cleaners, promising effective results at a quicker speed. These products range from general limescale removers you’ll find in supermarkets to products created solely for shower heads such as shower head cleaners available here. You can also look out for shower heads that are easy to clean, like the one listed below which has a rinse-able dirt filter and QuickClean feature for easy removal of limescale by simply rubbing your fingers over the silicon nubs.
How To Unclog Shower Drain
If you ever find yourself faced with the common problem of a clogged shower drain, fear not! Just like cleaning your shower head, there are a couple of ways you can go about unclogging it, from shop-bought drain unblocker to natural ingredients you can find in your kitchen:
Keeping it natural – sometimes the traditional ways are the easiest and most cost-effective. With just baking soda and vinegar, more often than not, your shower drain can resume its normal function. All you need to do is pour a cup of baking soda drown your drain, then, after a few minutes, pour an equal amount of vinegar down there, too. To finish the job, add some hot – but not quite boiling – water to the mixture and let it sit for a couple of hours. If the drain still refuses to flow freely, repeat the process!
Industrial action needed - for a quick and easy fix without going through the process of raiding your pantry, a large array of drain unblockers and drain cleaners can be purchased at your local supermarket at an affordable price. Which? (the largest consumer body in the UK) has created this helpful Shower Drain Unblocker Guide on the pros and cons of the best unblockers, but these are their top three recommendations:
- Buster – ‘Bathroom plughole unblocker’. Single-use. Takes 15 mins.
- Mr Muscle – ‘Power Gel Drain Unblocker’. Single-use. Takes 20 mins.
- Bathroom blocks away – ‘Plughole unblocker’. Two uses. Takes 6 hours.
How To Remove Shower Drain
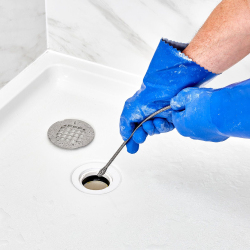
If these methods have failed to complete the job adequately or your shower drain has to battle against vast amounts of hair, you may need to finish the cleaning process by removing the shower drain. If you’ve gone through life without having to remove a shower drain before, don’t fret - you can get the job done without needing a handyman!
- If your drain is rusty, use a silicone lubricant to help loosen it - WD-40 is ideal for this! Pour the lubricant generously around the shower with a little poured down the drain to give it the best chance of working. For this first step, ensure that the shower drain is completely dry so the lubricant can stay on. Let it sit for 5-10 mins before moving on to the next step.
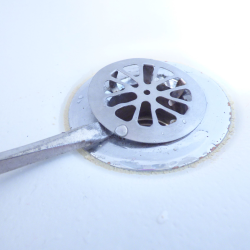
- This step is dependent on what type of shower drain you have; if your drain is attached with screws, go ahead and use a screwdriver to loosen the screws, then place them somewhere safe to put back later. Other shower drains should be able to be pulled up by hand or with some extra help from pliers.
- Next, gently insert two nose pliers into the drain opening, one on either side of the drain. With a plier firmly grasped in each hand, twist both handles to the left to loosen the drain, adding more lubricant as you go along if necessary.
- Continue twisting until you reach the end of the screwed portion of the drain, at which point the drain can be lifted up. To do this, firmly grasp the pliers and lift the drain out, this must be done very slowly to avoid damage to the drain, ensuring you apply the right amount of pressure to the pliers - too loose and you may lose grip, too tight and you may break the cover.
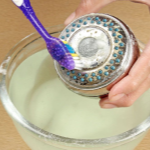
- Now you have your drain out, the last thing to do is to clean it. Start by removing any hair and dust you can, then, to fully clean the drain, soak it in vinegar and baking soda. This method works well alongside a plastic sandwich bag. Simply pour equal parts white distilled vinegar and baking soda into the sandwich bag, pop the drain in there and leave to soak for a few hours.
Extra Tips
- If your drain is particularly rusty, it’s a good idea to begin this process by generously spritzing the drain with some rust remover.
- If, when you take your drain out, you notice it is rusty or damaged beyond repair, contact a plumber to help you determine what size or brand is right for your shower and purchase a new drain.
