Interior Paint Buying Guide
Are you about to transform your home with brand new interior paint? Make the job easier with our selection of handy tips from our extensive paint guide and find the right type of paint for your project.
Intro
It is estimated that we can visually distinguish around 10 million different shades, which makes deciding which colour to paint your living room quite daunting! But before you spend hours pouring over paint tester pots and swatches, you need to understand which type of paint you’ll be using and why.
Types of paint
What Is Ceiling and Wall Paint?
Ceiling and wall paint, also known as emulsion paint, is specifically designed to deliver great coverage on plaster and Artex (the surface usually used on ceilings). The emulsion is a water-based paint mixed with acrylic or vinyl. It’s easy to apply with a roller or brush and it comes in an exciting range of finishes, like satin, silk and matt.
Here are some tips to consider when painting with emulsion:
- Invest in a paint kettle. By decanting some emulsion from its tin into a smaller plastic container, you can save time and energy by not carrying a couple of litres of liquid around when you paint. Plus, it keeps the paint in the tin much fresher as you don’t need to keep dipping your paintbrush.
- Don’t use paint straight from the tin. It’s best to dilute the emulsion with water; many brands require up to 25% water before they’re ready to use.
- You can test that your emulsion is ready to use by letting a drop of paint fall back into the tin. If the drop rests for a second before disappearing, it’s ready.
- Cleaning walls before painting is essential. Try using sugar soap to clean and some sandpaper to smooth them.
Emulsion often requires a primer, particularly if you switch from a dark colour to something lighter. You could use two coats of white paint for this or a mist coat, which is just a watered-down emulsion.
How to Paint with Gloss?
Gloss paint gives a polished finish to interior wood and metal for example. It’s tough and durable giving a high sheen finish to surfaces. Because it reflects light, it’s not as good as hiding imperfections. You can wipe gloss paint without leaving any marks.
Here are some things to consider when painting with gloss paint:
- Gloss paint is oil-based and does not apply as smoothly as a water-based emulsion. Additionally, when this paint dries it will form a very hard layer.
- You should ensure the surface of the wood is primed with a smooth matt finish before you begin painting.
- Always wait until the primer is dry before painting.
- Paint gently in long strokes to avoid brush marks.
Premium Paint
Premium paint is high-quality luxury paint that delivers a vibrant depth of colour and quality finish. See the Dulux Heritage collection for inspiration combining classic colours with new contemporary trends for a timeless look.
Here are some things to consider when painting with Dulux Heritage:
- Wait between two and four hours before applying a second coat of Velvet Matt and six hours for Eggshell.
- Don’t push down too hard when rolling your paint onto the walls.
- Use a synthetic bristle brush; a 4-inch paint brush for larger areas and a 2-inch paint brush for edges and cutting in.
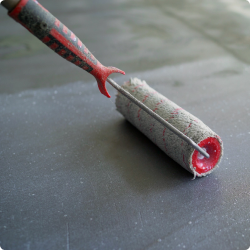
Floor Paint
Floor paint is a unique type designed to withstand foot traffic and abrasion. This durable paint includes tough resins and binders in its formula, so the paint maintains its appearance under frictional stress. Floor paint is usually used to add colour to concrete flooring, or to visually mark fire safety areas, walkways, and hazard areas for pedestrians.
If you have never tried painting your floors, we recommend the Macpherson Trade Paint Range. These paints offer a hard-wearing surface that is simple to clean and maintain once dried. Macpherson’s range is ideal for both commercial and residential areas, requiring reliable and long-lasting floor protection.
Paint finish
There are different types of paint finish such as eggshell, satin, gloss and matt. It’s important to think about what type of finish you are after and how well you want it to last. Each finish has a different amount of sheen. Usually the shinier the finish the easier it is to clean and wipe down. Here’s a quick guide to paint finishes:
Eggshell paint is a type of finish, it has a beautiful soft sheen that’s often seen as the middle ground between gloss and matt. When it comes to choosing the right finish, you need to consider the traffic levels of the room. For example, if you’re painting your kitchen, you might like something durable and easy to clean - high gloss paint is perfect for this. In addition, eggshell is suitable for woodwork and metal as it creates a beautiful contrast to your matt walls. Try it on your skirting and architraves!
How to paint a room
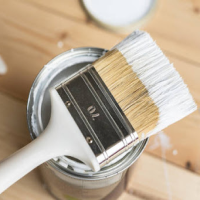
Once you’ve found your perfect finish and colour, here are a few things you’ll need to get started:
- Paint brushes - Why not try the Prodec Premier range or the Hamilton Perfection range!
- Paint rollers - The Hamilton Prestige and UltraCover Trade ranges are both great options for smooth and easy application.
- Roller extension pole - Ideal for harder to reach areas.
- Paint stirrer - You’ll need to stir your paint for a couple of minutes before applying it.
- Clingfilm and rubber bands - Wrap your brushes and rollers up between use to avoid them drying out.
- Protection sheets - There are a lot of options to keep your surfaces protected during the painting process, you could try Taktec for floor protection and Ultratape for window and glass protection.
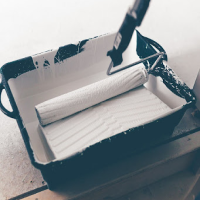
- Paint tray - Paint trays are ideal for minimising mess.
Preparation
To prepare the room for painting, first, remove any obstructions. This includes everything from furniture to switch covers. If you have light fittings that cannot be removed, you can always cover them with a plastic bag and tape. If there’s anything too large to remove from the room move them to the centre and cover them well with plastic sheets.
Some obstructions, like moulding, require too much time and effort to remove and later replace. Besides this, you may cause damage to the walls by removing them. Unless you are doing a full room remodel, you may find it easier to mask off baseboards, crown moulding, and trim around windows and doors.
Few professional decorators would be found without a set of work lights. This is because when you shine a white light on the wall that you’re painting, you get a truly clear visual representation of how well the paint is going on. Ceiling lights just don’t do as good a job! You can find inexpensive LED work lights.
The last key thing: tape. Run long and uninterrupted strips of painter's masking tape along the juncture between the wall and ceiling, adjacent walls, and along the top of your baseboards. If the wall has a door or window, run the tape around the door or window trim (this protects them from any spattering).
Let's get started!
That’s the hard bit done. Now, onto the fun of painting your walls.
1. Apply the primer
You don’t always have to use primer when painting a wall. This is particularly true when you are repainting a wall the same colour and the existing paint quality is good.
Always use a drywall primer when the surface is bare lining paper. Professional painters often request the paint store pre-tint the primer to bring it closer to the intended wall colour, rather than leaving it the usual stark shade of white. (This greatly reduces the number of paint coats you’ll need!)
If you’re painting a large area and want a professional finish, we suggest using a trade quality primer (like the Macpherson Trade Acrylic Primer) because trade paints offer higher opacity and increased durability compared to normal paints and primers.
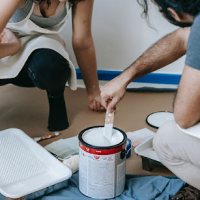
2. Mix the paint
Unless the paint was mixed in the store a couple of hours before you start painting, it will need to be mixed again. Either use a wooden paint stirring stick, or chuck a metal spiral paint mixer attachment into your power drill.
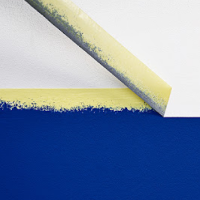
3. Paint the edges
Paint a 4 inch wide swath along the edges with a 2-inch angled paint brush by dipping the brush lightly into the paint can, wiping off the excess, and then painting alongside and slightly on the painter’s tape. Alternatively, if you’re using the cutting-in technique, paint the edges about 4 inches inwards as well. With either method, paint at least two coats.
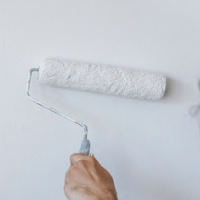
4. Roll the paint
Now you’ll roll paint on the inner part of the wall. Dip your paint roller in the paint tray and thoroughly squeeze it out by rolling it along the tray. Place the roller on the wall and paint it in a ‘W’ shape. Then ‘fill in’ the ‘W’ in order to cover small sections of about 4 feet high by 4 feet wide.
Tip: always finish one section before moving on to another. Make sure that you are always working off a wet edge, as this helps avoid streaking!
5. Let the paint dry & add a second coat
After the wall is finished, wait at least a few hours for it to dry. The glossier the paint, the longer it may stay damp. Flat paint can be ready for repainting in as little as an hour in dry, warm conditions eg. in summer. Now add your second coat.
6. Clean Work Area
Always remember to clean your brushes and rollers. Remove any drop cloths and let them air dry outside if you can. When your project is complete, wait until the next day to remove the painter’s tape by pulling it straight back, creating a lovely sharp line. And you’re done!
How to match a paint colour
Once you have decided what type of paint suits your room the best, it’s time to choose the shade.
For those seeking a perfect match, for example, when refreshing an existing paint job without knowledge of the original shade, collect a paint chip from the wall and bring it to a paint specialist. This method is ideal for generating an objective colour match.
Alternatively, if you’re looking for an entirely new look, you could try matching an object to your desired colour; this is often preferable to showing a picture on your phone because it removes the risk of colour variation from a screen.
Many retailers offer an appealing array of paint colour concepts for you to choose from. If you find yourself surrounded by various colour samples, but none resonate with your vision, don't hesitate to explore a colour mixing service. This service can help you achieve a personalised colour that suits your preferences.

Builder Depot's bespoke colour mixing service offers a wealth of creative possibilities. Explore the complete range of Dulux Heritage hues or seamlessly match your favourite shades from industry-leading brands. Join us in-store, where our experts are happy to assist you or take advantage of our online platform to order a custom mixed tin of Dulux Trade Vinyl Matt, delivered straight to your doorstep.
Helpful extras
How to get paint out of clothes
You’ve tripped over a paint tray and now you’re clothes are sticky and not their intended colour! Removing paint is tricky but as long as you approach the problem quickly and efficiently, you stand a good chance of being able to wear your favourite white T-shirt again (we won’t ask why you were painting in it in the first place). Mix one part warm water and one part washing up liquid then blot the stain with a sponge soaked in the solution. Once the stain is gone, wash the garment in cold water.
How much does it cost to paint a house interior?
If you are feeling a little anxious about the cost of repainting your home, don’t worry! You are not alone. Whether you have just moved into a new home or fancy adding a splash of colour (it’s generally recommended to repaint your interiors every 5 to 7 years) here’s a researched post for your information, calculating how much it would cost to paint a 4 bedroom house in the UK.
How to paint kitchen cabinets
First thing first, you’ll want to remove your cupboard doors so you can paint horizontally. This will reduce any run and drips. It’s also recommended that you remove the door hardware. Clean the doors to remove any kitchen grease and then sand until you’ve got a nice smooth surface. Start at the hard to reach areas using a brush and then use a roller to complete the larger areas, this will ensure a nice even surface.