Free Click & Collect In 1 Hour From New Southgate Store | Free Delivery Over £500 inc VAT
Free Click & Collect In 1 Hour From New Southgate Store

Choosing Exterior Paint, Varnishes and Oils

Whether you love bright colours or appreciate the aesthetics of healthy natural wood, your outdoor furniture should reflect the beauty and vitality of your garden. This guide will help you freshen up your exterior area and take care of it so it stays looking summer ready.

Exterior Painting & Varnishing

Intro

There are many products available to protect exterior surfaces against weathering, ageing and cracking. You can use exterior paints such as Dulux’s White Masonry Paint to compliment or contrast your garden's colour scheme, or perhaps you want to retain a natural look for your outdoor space by using a varnish or oil, like Ronseal’s Natural Oak Decking Oil. Whatever exterior care product you choose, all options provide an extra layer of defence against the wind, sun, animals and other things that can invade the architecture and penetrate walls, helping to preserve the life of your exterior walls.

So, whether you are considering painting brick, metal or wood, there is an exterior paint that will work well for you. Sometimes a more specialist paint may be necessary, or perhaps paint bypassed entirely and a more natural oil or varnish considered. Whatever you need, this guide will break down each option to help you find the best fit for the job at hand.

What is the Best Outdoor Paint?

Choosing what exterior paint to use is largely dependent on the type of surface you are painting on. Most names are self-explanatory, for example, masonry paint is best for masonry, wood paint is best for wood… and metal paint is best for metal. Whatever the job, there are a few questions you should ask yourself before proceeding to help ensure you make the best decision.

Surface Conditions To Consider When Painting

The condition of the surface that you are planning to work on is pretty vital when deciding the type of paint you may need and the kind of preparation and product you will need beforehand (you may not need to do any at all). If the surface you’ll be painting is on the older side, you’ll need to make sure it is as clean and as dry as possible and in good repair. You’ll also want to remove as much dust, mould, algae and moss as you can from surfaces like wood and brick. You can do this in a couple of ways:

  • For algae on brick surfaces, you can use products such as our algae cleaner.
  • For mould on wood surfaces, you can tackle it DIY-style. There are many helpful resources to guide you through this process online, including This Old House's. Regardless of the method, always ensure you’re wearing the correct protective gear!
  • For dust, simply wipe down the surface with a barely damp microfibre cloth. If the surface is wood, make sure you quickly dry the area to prevent mould growth.

Picking The Right Paint Finish and Colour

Make sure you’re taking time to consider what you want the final result to look like, as picking out the correct external care product will be vital in achieving this goal.

Colour: You can opt for a bold shade to add some brightness to your outdoor space, or a softer, more muted choice that still adds a pop of colour, such as this delicate magnolia shade from Dulux. Perhaps you want something that can blend in with its surroundings seamlessly and expertly conceal the weathering of an older surface, such as Blackfriar’s tile red shade of masonry paint, perfect for use on bricks and tiles.

Surface: Of course, consider the surface you’ll be painting; if you want to enhance the natural look of a material, such as a wooden fence, simply staining it can help to bring out its natural features whilst still protecting it from the elements. Products such as Ronseal’s Satin Woodstain are perfect for this job, not only maintaining the look of the wood, but preventing the surface from cracking, blistering and peeling throughout its extended life span.

Finish: With exterior paints available in different styles and textures, it's worth having a think about what you want the final finish to be.

  • Matt Finish: Paints such as this will produce a flat, non-reflective finish and help to disguise bumps and uneven surfaces.
  • Satin Finish: Also known as silk, this kind of finish offers a low and refined sheen, offering a happy compromise between matt and gloss.
  • Gloss Finish: Gloss finishes provide the highest level of sheen and are also the most durable choice on offer. Due to its longevity and hard-wearing characteristics, this paint is ideal for areas that will get bumped or scuffed regularly, such as external doors.
  • Smooth Finish: This finish is only available for masonry paints. It gives the surface a velvety, smooth finish and is very quick and easy to apply.
  • Textured Finish: Also known as fine-textured finish, this paint is used to give masonry long-lasting coverage that helps to conceal uneven surfaces and smaller cracks.
  • Hammered Effect Finish: This paint is exclusively made for metal paints, with the aim of creating the effect of the surface looking distressed or textured. Some hammered effect metal paints can replicate the look of cast iron, or even galvanised metal, making it perfect for upcycling projects outside.

How much time is available to complete the project?

If you’re limited for time, do not worry! We offer a range of quick-drying options to ensure whatever job at hand gets completed as quickly as possible, like our Dulux Quick Dry Satin Paint that is touch-dry in just 1-2 hours.

Surface Type Roller Sleeve For Use With Ideal For Painting These Surfaces Roller Sizes
1 Smooth Water based paintsWater Based Icon Walls, ceilings, GIB-board, plaster, smooth wallpaper, hardboard 75mm, 100mm, 180mm, 230mm, 270mm
2 Textured Water based paintsWater Based Icon Imperfect walls & ceilings, textured plaster, embossed wallpaper, fences, rough sawn timber 100mm, 180mm, 230mm
3 Rough Water based paintsWater Based Icon Rough plaster, brickwork, stucco, trellis, blockwork 100mm, 230mm, 270mm
4 Smooth Acrylic enamel paintsAcrylic Based Icon Doors & joinery 100mm, 180mm, 230mm
5 Smooth Oil based paintsOil Based Icon Walls, ceilings, floors, plaster, wood, GIB-board 75mm, 100mm, 180mm, 230mm
6 Extra Smooth Oil based paintsOil Based Icon Fine finishing on doors, cupboards, marine work, varnishes 75mm, 100mm, 180mm, 230mm

Types of Exterior Protection

As briefly mentioned before, there are three main types of material the products can be used for: masonry, metal and wood. Each paint has slightly different properties that work best with the surface in question, so it can pay off to remember your options:

  • Metal exterior paint
  • Masonry exterior paint
  • Exterior woodcare, which can come in the form of (1) exterior wood paint (2) exterior wood oil (3) exterior wood stain and (4) exterior wood varnish.

Most paints also require a layer of undercoat or primer before application to ensure the paint goes on smoothly.

Let’s look into each option in more detail…

Exterior Wood Paint

Exterior Wood Paint

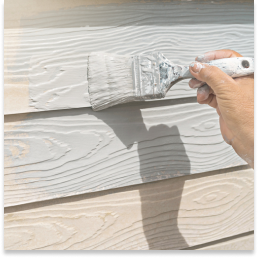
Exterior Wood Paints are a great way to add a strong splash of colour to your outdoor living space, offering a range of colours the other options can’t! These paints are designed to survive the elements and are a great way to bring back tired-looking decking or fences. They are also great for smoothing out rough surfaces, filling cracks and locking down splinters.

Appearance: Opaque colour of your choice, e.g. ‘slate’.

Tip: Removing paint from wood will require extensive scraping.

Exterior Wood Stain

Exterior Wood Stain

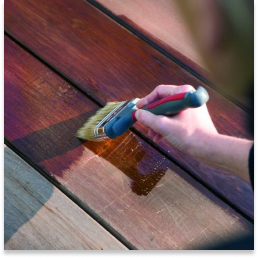
Whereas wood paints coat the top of the wood, stains make use of the surfaces’ porous properties to penetrate it deeper. This gives it further protection and helps preserve your wood's beauty. Stains also gradually wear away naturally, so although you don’t have to worry about scrapping it off, ensure to periodically recoat it.

Appearance: Opaque natural colour, e.g. ‘oak’, ‘mahogany’ or ‘walnut’.

Tip: The more opaque the stain, the more protection you will have.

Exterior Wood Oil

Exterior Wood Oil

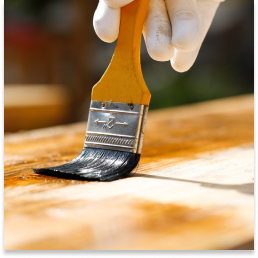
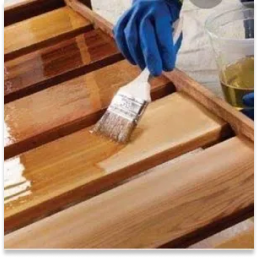
Wood oils are another product that penetrates the wood itself, nourishing the wood and replacing its natural oils. Due to this, they usually have to be applied to bare, natural (or sometimes stained) wood. Exterior wood oil is super effective at preventing timber from splitting and cracking due to its non-flaking and water-repellency qualities and is great for high foot-traffic areas, like decking. However, applying oil to your wood is often considered a more laborious and time-consuming process than that of other protection products (like paint or varnish), so if you need a fast finish, consider choosing one of the other options, like Dulux’s ‘quick dry’ exterior protection.

Appearance: Most oils are transparent, however, some colour options are available, e.g. ‘cedar’ or ‘oak’.

Tip: Cloths used to apply oils carry a risk of spontaneous combustion if left in a pile, so allow them to dry flat or soak in water before disposing of them.

Exterior Wood Varnish

Exterior Wood Varnish

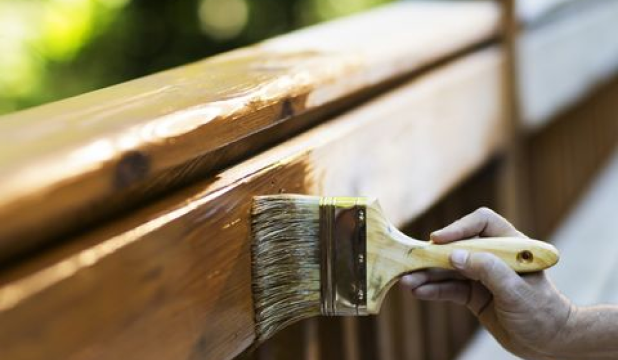
arnishes give a hard coating to wood and aren’t able to penetrate the surface. Due to this, they can offer protective treatment to exterior wood, defending it from mould, fungus and mildew. Unlike oils which have to be applied to bare, untreated wood, varnishes can be applied onto previously painted, stained or varnished surfaces (after a little sanding).

Appearance: The vast majority of oils are clear, however, a few natural colours are also available.

Tip: Wood varnish can often be applied over certain wood oils for extra protection.

outoor masonry paint dulux white

Exterior Masonry Paint

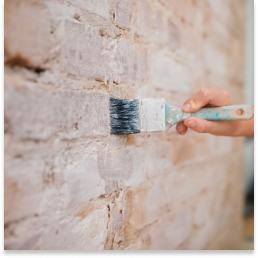
Exterior masonry paint can be used as both a protective and decorative paint, ideal for brick, pebbledash (roughcast), stucco, cement, concrete, stone and more. There are four broad types of masonry paint on the market today: acrylic, silicone, limewash and oil-based. Deciding what paint to use is all dependent on what you want to achieve, but acrylic paint is generally the easiest and cheapest option to complete the job. For more specific information on masonry paint and the different types, check out this helpful guide created by experts at Painters World.

Appearance: Opaque colour of your choice, e.g. ‘eggshell white’, ‘magnolia’ or ‘brick red’.

Tip: A smooth masonry paint is generally better than a textured one for rougher surfaces such as pebbledash.

exterior metal paint

Exterior Metal Paint

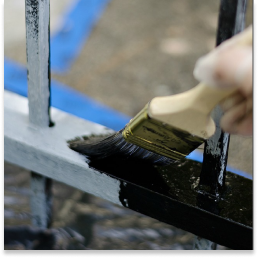
Exterior metal paint is highly durable, and suitable for metal railings, garden gates, sheds, garden furniture, garage storage and even drain pipes.

Rust-ridden surfaces can become a real eyesore, but luckily exterior metal paint can help to breathe new life into your tired–looking garage door or metal fence. Not only are metal paints durable, but they’re designed to provide protection from corrosion and rust, whilst providing a good, clean finish at the same time.

There are two types of metal paint to consider:

  1. Direct-to-galvanised metal paint: This is the best choice for non-rusting metal surfaces such as galvanised steel, aluminium, copper and brass. It’s formulated to be directly applied to any of these surfaces without the need for a primer and is available with a built-in topcoat, too.
  2. Direct-to-rust paint: This is ideal for use on metal surfaces without the need to remove the rust entirely. You won’t always need a primer, but do remember to clean and sand down the rusty area before you get started - and always check the paint instructions!

Appearance: Opaque colour of your choice - often monochrome e.g. ‘black’, ‘white’, ‘grey’ or ‘silver'. Also available in different finishes, e.g. matt or hammered-effect.

Tip: Power-wash or scrap off old flaking paint, dirt and grease to ensure a good, smooth paint finish.

exterior undercoats and Primers

Undercoats & Primers

Primers are not necessary for every painting project, but most of the time choosing the correct bonding primer for your application will make you far more likely to get great adhesion of your finish coat to the surface. For most projects where you’re just going over a previously-painted surface, you won’t need to use primer. In many cases, all you’ll need to do is spot-prime any bare areas before applying your finish. For more in-depth advice on what primer to use for each material, take a look through Image Works’ guide on primer.

Appearance: Primer is usually white but can be other neutral colours. This is to provide a neutral surface to ensure that the paint colour shows true.

Tip: Before you grab a multipurpose primer off the shelf, check that it specifically states on the label that it can be used for your intended purpose.

Optional Features of Exterior Paint

Between the textures and finish of your paint and the surface it’s planned to go on, there’s a lot to consider when choosing your paint. Surprisingly, it doesn’t stop there! Here are a few extra features that paints may include in their formulas to help you complete your painting job as best as possible:

  • Dirt & stain-resistant / Washable: Enables you to wipe or scrub stains away without damaging the paintwork. 
  • Self-cleaning: Creates a hydrophobic surface that does not allow dirt to attach to the wall - but even if it does, a drop of rain would soon remove it. 
  • Algae & mould-resistant: These paints have antimicrobial properties to help keep mould under control. 
  • Colour protection / Fade-resistant: The higher the level and quality of the binder, the more fade-resistant your paint will be.
  • Anti-scuff: Protects walls from scuff marks left behind from items such as shoes, making it perfect for high-traffic environments.
  • Anti-climb: Anti-climb paint is thick and oily in consistency, designed to make walls, fences and other surfaces slippery and hard to climb.
  • Quick-drying: Consider a quick-drying paint formula for when you’re pressed for time or you need to be able to use the area in a short time span. 
  • Weatherproof / Water-resistant: Prevents the risk of damp and seepage, acting as a barrier against water and inhibiting the growth of moisture-dependent microbes.
  • Breathable: These paints allow water to evaporate away quickly, allowing walls to breathe naturally without trapping moisture.

Equipment

From preparation to application, you’ll need some tools and advice to help you complete the job!

Preparation: Before you Paint

  • Remove lead paint: Although lead paint has been completely outlawed since 1992, many homes still have lead paint on their walls. If you suspect lead, don’t try to scrape or sand it off; you’ll have to call out a contractor who is certified to handle lead abatement.
  • Remove mould: Use some bleach, microbiocide, or fungicide to remove mould and mildew. If you’re painting a house where mould is an issue, choose a mould-resistant paint or add some mildewcide to the paint to prevent your paint job from developing future contaminant issues.
  • Wash your wall: Get your surfaces as clean as possible before you paint. Pressure washing is a great option for surfaces that are stained, but for softer or older woods, hand scrub with detergent and water.
  • Remove peeling paint: You’ll need to strip and scrape off the paint with a stiff metal wire brush before priming and painting the surface. Ensure you wear a dust mask as well as work gloves and eye protection when working with peeling paint.
  • Fill holes: You may have to fill holes and caulk surfaces. You can use a joint or drywall compound for this.
  • Sand the walls: Refresh the surfaces of weathered wood with medium grit paper to provide a better mechanical bond between the coats of paint.

Application: While you Paint

  • Paintbrush: A paintbrush is ideal for narrow surfaces, edges and smaller areas. One with nylon or polyester bristles would be ideal with almost any type of exterior paint.
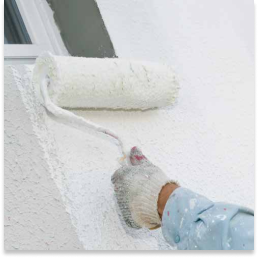
  • Paint roller: A paint roller gives you the control of a paintbrush and due to its porous surface is able to hold much more paint than a brush, getting the job done quicker.
  • Paint spray: Spray-painting is ideal for large jobs such as your garage or outdoor wall if you need it done quickly and with a professional finish. The main issue with spray painting is over-spraying and wasting paint!

How to Remove Paint from Exterior Brickwork

Fortunately, it is possible to remove paint from brickwork, but you will have to consider a few things first.

Condition of the brickwork:

  • Newer bricks: If you have newer brickwork, sandblasting can be a good choice for removing paintwork. However, due to the mess caused by this method, it’s only really an option for outdoor spaces.
  • Older bricks: Sandblasting or similar techniques should be avoided for older bricks as there is a likely chance of them being damaged in the process.

For smaller or indoor brickwork, a more subtle method will have to be used to avoid the mess that comes with a sandblaster. Using paint-stripper is a popular choice and, with a small selection of some basic tools, can be super effective at giving your bricks a new lease of life.

What you'll need:

How to do it:

  1. Test and prepare the area: You’ll want to test out the condition of the bricks before going all out; this will give you a good indicator of how effective the stripper will be. If the paint in question is old, it may be worth testing for lead with a suitable kit.
  2. Protect yourself: You want to avoid getting any paint stripper on your skin so be sure your arms and legs are covered. It’s also a good idea to wear gloves when applying the stripper, goggles and a dust mask when using a wire brush, or wire brush attachment, as this usually brings up a lot of dust.
  3. Apply the paint stripper: Using a paintbrush – a four-inch one is a good choice, such as the ProDEc 4” Brush – and apply the paint stripper. Make sure to read the specific product instructions on how to apply the stripper. For trickier-to-reach areas, such as mortar joints, dab in the stripper with a push. When starting, only work in small sections, ideally one-metre squares. Then, double the size of the area of the paint stripper to 2x1 metre sections, so you can work on one section while the stripper removes paint from the other.
  4. Remove the paint: Leave the paint stripper for as long as instructed. Start at the top and work across, then down and across again to help ensure you get as little paint and stripper on you as possible. For stubborn areas, you may need to reapply the stripper again. Clear away the old paint before continuing.
  5. Paint residue: When finished, apply some hot white vinegar on a cloth and dab it to remove the paint residue. Feel free to use a wire brush (or wire brush attachment) to remove any remaining paint, if necessary.